INSPECTIONS (QUALITY CONTROL)
Contents
Inspection Template:
Create New
Inspection Template:
Duplicate
Inspection Template:
Assign or Modify areas and spots to a Template.
Inspection Template:
Assign to a Service Location.
Other Features: Setup
Predefined floor list
Other Features: User
Predefined Comment List
The way the system is designed inspections will be done on the field, at the service location. The Office (CC Cloud) will get the results and they will be able to print reports. Any settings from the inspection module can be modified in the administration tab. There are several customizable fields to setup before doing an inspection, and they can be modified as needed later on. The field manager will get any updates when Syncing CC Inspect on the mobile device.
The inspection template is assigned at the service location. You can use the same template in all service locations, a general template in your office or you can have a different template setup at each service location. Our system comes loaded with example templates; you can use them if you want or you can customize your template according to your needs. After having your template completed you can then assign to a service location.
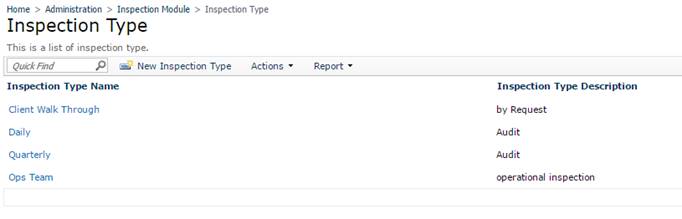
When a field manager creates a new inspection in his device he will be prompted to select an inspection type. To customize or change the inspection type you need to change this in the Administration settings, after making the changes the employee will be able to Sync his device and any changes will be updated in his CC Inspect.
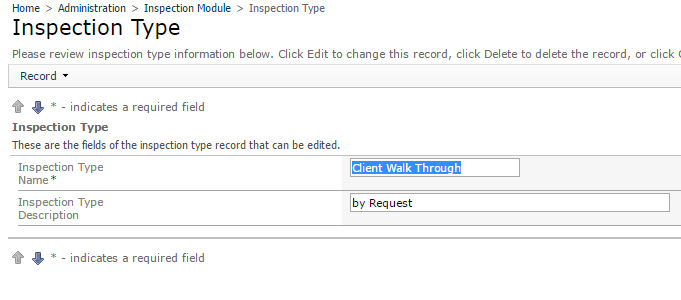
To change the Inspection Type, first go to Administration>Inspection Module>Inspection Type. Click on New Inspection type to create a new one. You can also edit a previously created inspection type by clicking on the blue link with the Inspection Type Name.
The Inspection Type Description option is optional in case you need to
enter more information. The description is not visible in CC Inspect.
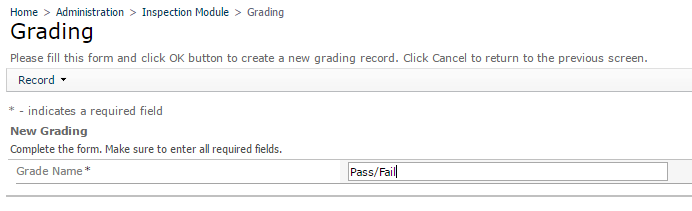
The first step is to go to administration>Inspection Module>Grading. In this example we will be creating a pass/fail grading system and then we will be applying this grading to the template. In the Grading feature click New Grading.
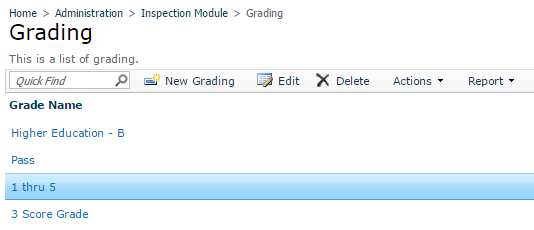
You will then able to create a name for the new grading scale, in the example we will name it Pass/Fail. After saving the name you will be prompted to create the grading scale where you can decide what grades will create a deficiency and will require further action.
Second. Under Grade Name enter the grading name. Then click ok to save. The system will display now the Grade Values to be created
Third. Under grading values, click on New Grading Values

The New Grading Values window will come up. Create as many values as you need. Each value will be visible in CC Inspect for the manager to select.
Value Name: This will be visible in CC Inspect for the field manager to select a grade
Value: The value will be used for report creation
Description: This is an optional field, you can enter a description of the grade, this is not visible in CC Inspect
Deficient: Select YES if you want the system to create a deficiency when the manager uses this Value Name.

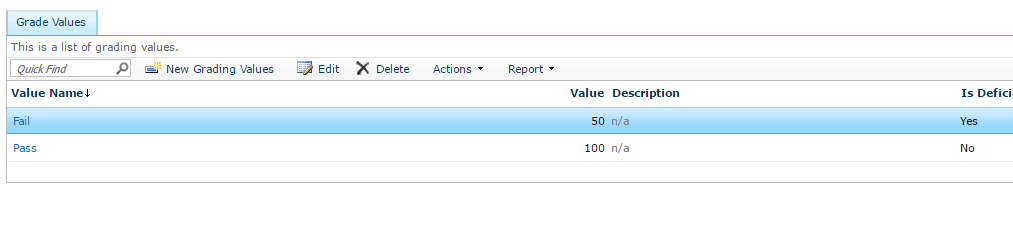
In this example, we created 2 values: Pass and Fail, where fail will create a deficiency
Inspection Template: Create New
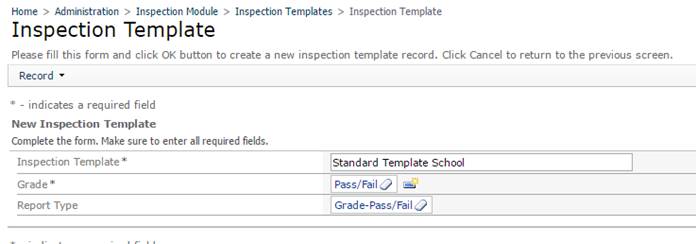
To create a new inspection name, go to Administration>Inspection Module>Inspection Templates>Inspection Template. This feature will allow you to create a New Inspection Name, you can later assign Areas and Spots in the template builder. First, click on New

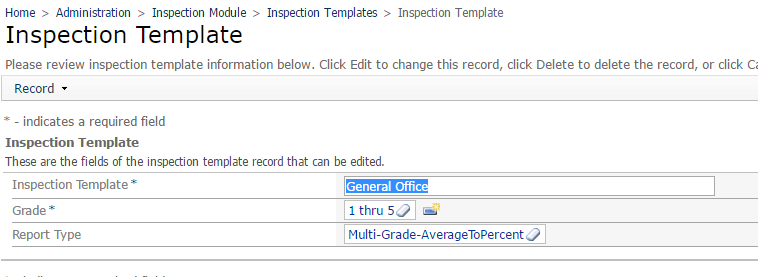
The window to create a New Template will come up.
Inspection Template: Enter
the template Name
Grade: Select a
grade name.
Report Type: Select
between
· Multi-Grade Number To Percent are grading values like 60,70,80,90, 100 score. They are values in percentage that we average. Use this is your grading scale uses values like 50, 60, 70…100
· Multi-grade Average to Percent are grades like 1,2,3,4,5. We take the averages and convert to a overall percentage score. Use this if your grading scale uses values as 1, 2, 3 and the system will convert to percent, using your highest grading value as 100%
Inspection Template: Duplicate
Under Administration>Inspection Module>Inspection Templates>Inspection Template, right click an Inspection Template Name a shortcut menu will show up, just click on Duplicate Inspection Template
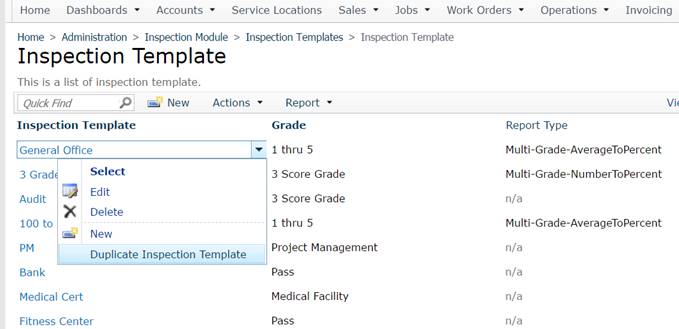
The window to select a new name for the template we are duplicating will show up. Grade, Areas and Spots from the selected template will be duplicated under the new template name. You can modify Areas and Spots for the new copied template on the template builder, without affecting the original one.
Inspection Template: Assign or Modify areas and spots to a Template.
After creating a New Template Name and assigning the grading, you can now go to the template builder to select/create areas and spots.
To modify areas and spots go to Administration>Inspection Module>Inspection
Templates>Inspection Template Builder.
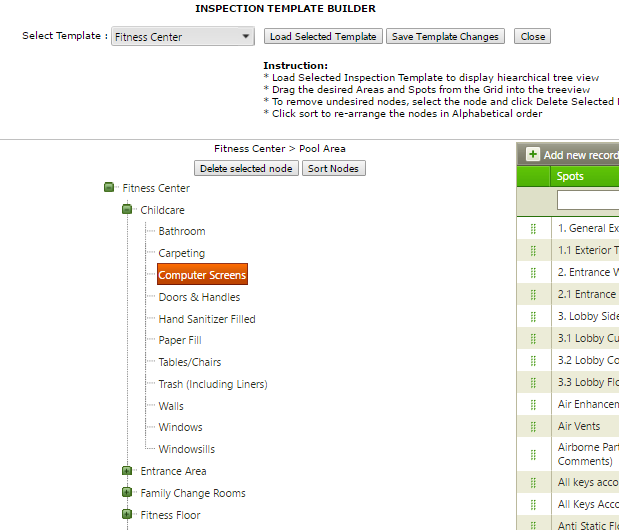
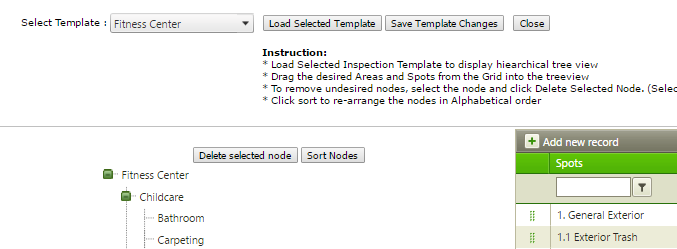
In this Window you can modify areas and spots from a new template name or a previously saved template, just select the Inspection template name and click on Load Selected Template. This will bring down all the areas and spots saved in that template.
**The employee at the field will be able to create inspections for the areas and grade the spots. The grading system will be the one selected for that template and it will be the same for all spots in that service location.
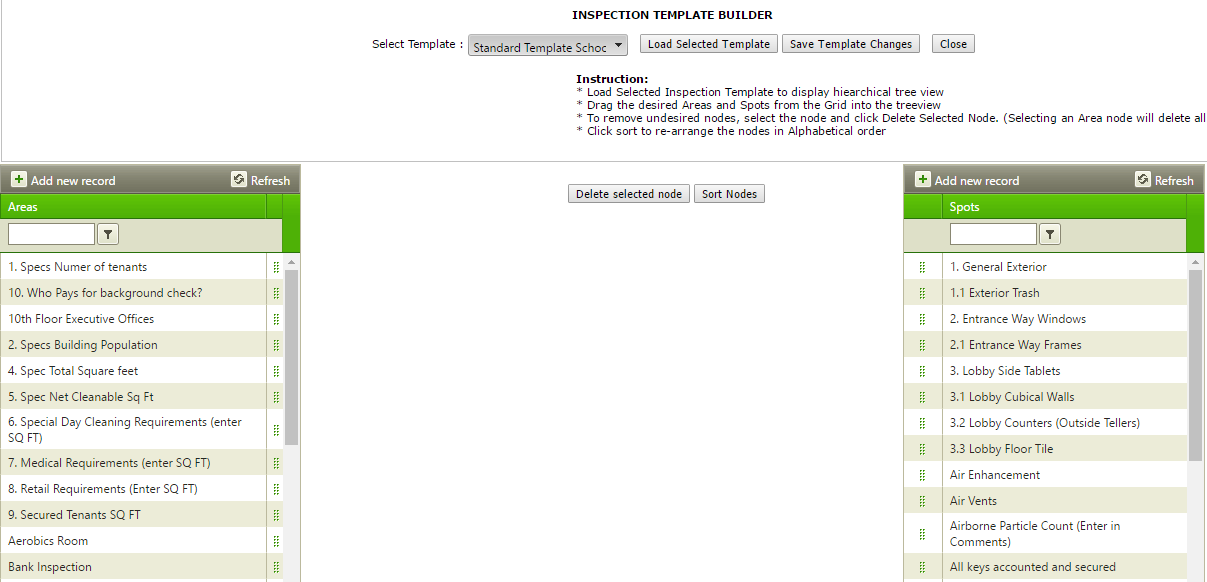
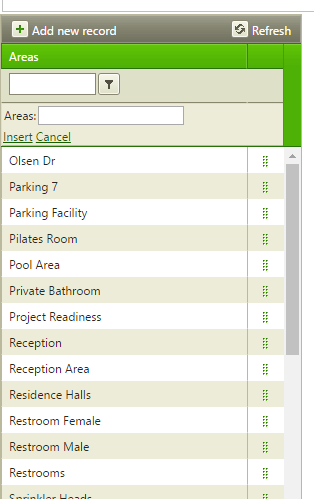
After you Load the Selected Template name, you can create or drag and area. To create an area or spot click on Add new record, then enter the area/spot name. Finally Click on Insert. The area/spot will be saved on the list below.
You can select an
area by clicking on ![]() and drag it down to the template name. After
saving the changes the system will sort areas and spots in alphabetical order
and drag it down to the template name. After
saving the changes the system will sort areas and spots in alphabetical order


To add a spot to an Area just drag it down by selecting ![]() to the area where you want the spot to be
graded.
to the area where you want the spot to be
graded.
![]()

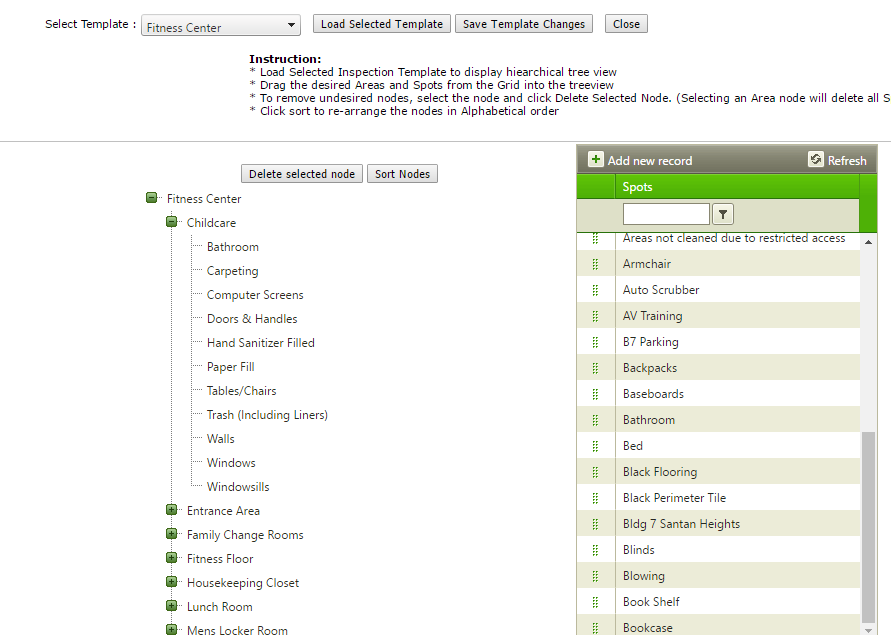
If you need to Delete an Area or Spot, just click on the desired Name and click on Delete Selected Node
![]()
After making any necessary changes on the Template click on Save Template Changes, then Close
![]()
Inspection Template: Assign to a Service Location.
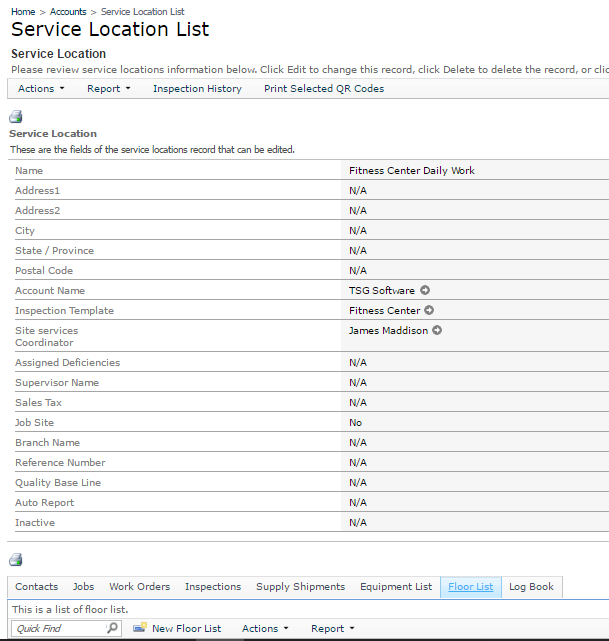
The final Step is to Assign this template to a Service Location. Go to a Service Location details and assign the inspection Template. There is also another option, Auto Report, if YES this will email an automatic report after an inspection is Synced to the Site Services Coordinator and Supervisor.
After assigning a template to a Service Location your employee will be able to Sync his CC Inspect and he will be able to create an inspection.
![]()
![]()

Other Features: Setup Predefined floor list
This feature allows the manager to sort the inspection in a location by floor instead of Area. To set this up you need to go to a Service Location and edit, then scroll down to the tab Floor List.
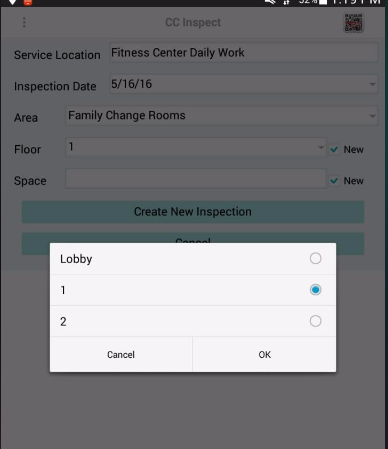
Under the Floor List tab, click on New Floor list, then enter floor name: Lobby and click OK. Do the same for each floor numbers.

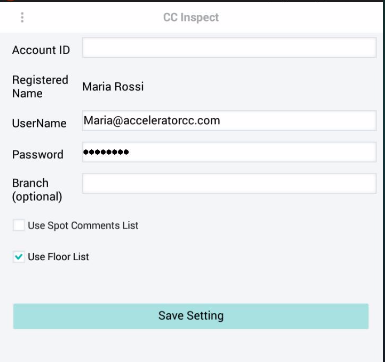
To use this, feature the employee doing the inspection will need to enable CC Inspect with the floor list feature. Under CC Inspect go to Settings and select use floor list.
This is how a floor list will look on the phone version.
Other Features: User Predefined Comment List
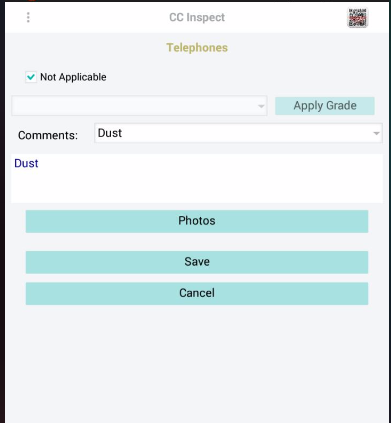
To use the Predefined comment list, go to Administration>Inspection Module>Inspection spot. Select the desired spot to add predefined comments and click on the tab for Comment List.
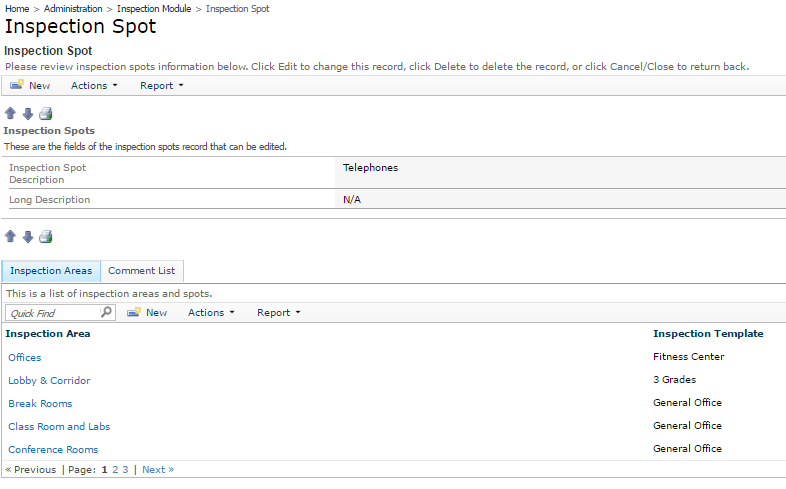
Click on Add new and enter the predefined comments. Click Ok
 The
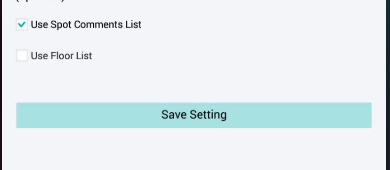
manager will need to enable the predefined comment list under settings. After
syncing CC Inspect the employee doing the inspections will get the list when
entering the comments saving him time on repetitive comments.
The
manager will need to enable the predefined comment list under settings. After
syncing CC Inspect the employee doing the inspections will get the list when
entering the comments saving him time on repetitive comments.
When selecting the spot, a list of comment will show and the employee will be able to select
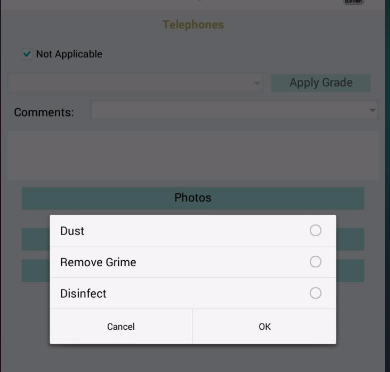
After selecting the employee can modify the comment if needed.