
Contents
Edit Service
Location information and Include Attachments.
Service
Location Grid and QR Codes
Accounts are your customers; they are billing entities. Payment terms will be setup at the account level. You will be able to setup Service Locations and Contacts at the Account level as well.
You will be able to review Inspection, Job. Work order and opportunity history at the Account level.
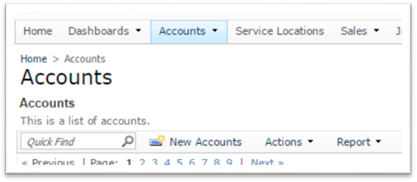
Create a New Account
To create a new Account. First Click on the Accounts Tab. Then Click on "New Accounts"

This will bring up the New Account form. Fill out all the Account information. Fields with an * are required

Fields with the create new symbol ![]() are customizable to your business. They can be modified as needed later on under
the Administration tab.
are customizable to your business. They can be modified as needed later on under
the Administration tab.
While creating a new account you will have the following fields to complete:
Name: The Account Name or it could also be a unique identifier
If you are working with a small company at which the Service Location and the accounts payable function (who pays you) for your client are at the same location, (and might even be the same person who you work with day to day). The name of the Account and the Service Location are likely to be the same.
However, for larger organizations, they often have many divisions and the accounts payable function might be in a different city from the Service Location at which you are providing service. In these, situations the Account Name is usually the legal name of the division. For example, GE has many divisions and legal entities. In my prior life as a building services contractor, we listed each Accounts Payable office as separate Account. We had GE Jet Engines, GE Energy, GE Capital all as separate accounts and we attached all the Service Locations to the entity that managed the facility.
The address information entered is for the Accounts Payable function or whoever you need to contact when invoices were approved and processed inside the client's company but are still not paid.
Account Type: You can lookup previously used account types or add a new type. This is 100% defined by your company to categorize the account types that you use to organize your company information. Many companies use this to identify the organization type that they are servicing. For example, one company's list looks like the following:
· Multi-tenant Office Building managed by CBRE
· Multi-tenant Office Building managed by owner
· Multi-tenant Office Building managed by Ackerman
· Medical Office
· Professional Office - not medical
· Distribution Facility
· Manufacturing Facility
· Big Box Retail
· Auto Sales & Service Facility
Campaign: For your use to track how you won the account. Examples include: website, email marketing, customer referral, March 15th Mailer, etc.
Account Status: For your use to track the
status of the account. Examples include: pending, active, terminated,
etc.
Term: This is the Accounts Payable terms that you have agree to with your client. Examples include: Net 30, Net 60, Due Upon Receipt, etc.
Sales Tax ID: This is for your use to track sales tax codes or information and to pass this on to your accounting system (through export or sync to QuickBooks desktop versions). Please note that this field is at the account level and often with services sales tax or VAT is calculated at the point of service and not where the administrative offices are located.
SalesRep Name: For your use if you want to track who brought in which accounts. SalesRep are selected from the employee table that is maintained under the Administrative Tab and who are listed as active.
Branch Name: Branches are used as a permissions filter. Often the branches are offices for larger organizations and Operations Managers for smaller organizations but it is entirely up to your company to decide how to use this grouping feature. Here are two examples:
A large national organization has each office listed as a branch and all of their national accounts listed. They have (a part of their list is shown):
· Denver
· Las Vegas
· Los Angeles
· San Francisco
· Portland
· Seattle
· IBM
· Wells Fargo
· Walmart
Another smaller single city player has their branches listed by the 4 Operations Managers that they have geographically distributed to cover their accounts:
· Eddie Escobar
· Lloyd Simmons
· Kathy Butler
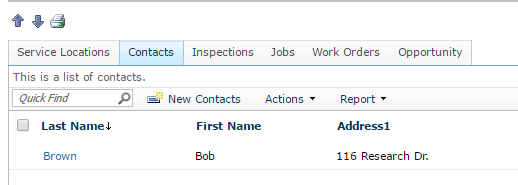
If you scroll down the Account Details, there will be six tabs: Service Locations, Contacts, Inspections, Jobs, Work Orders, Opportunity.
You are able to create New Service Locations and Contacts from the Account tab. For Inspections, Jobs. Work Orders and Opportunities you will be able to see the history.
The Service Location is a building that is linked to an Account. An account can have multiple service locations assigned to it. You assign a Site Services Coordinator to a service location. You also assign an inspection template at the service location level.
Jobs (Contracts), Work Orders, Inspections will be linked to the service location.
Create a New Service Location
There are several different ways to create a new service location.
You can go to the Accounts
tab, go into the specific account name
and then scroll down. Then click on ![]() New
New
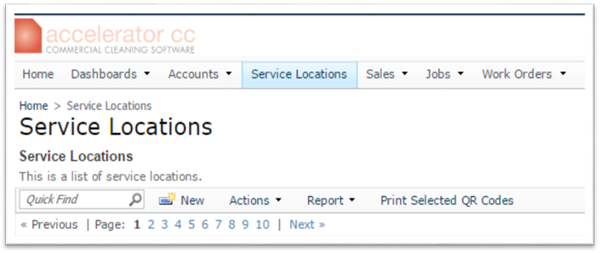
You can also go to the Service Location tab and click New
The form to create a new Service Location will display. Required fields are the ones with an *
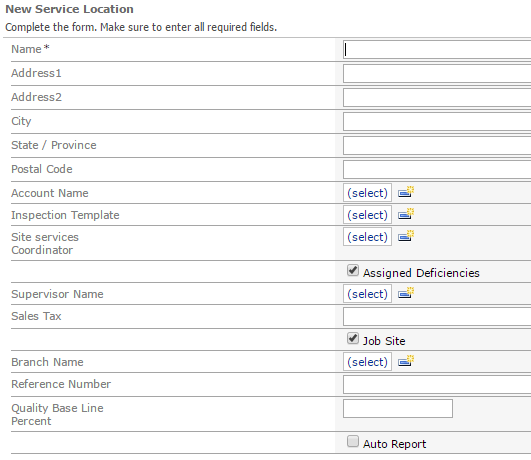
Name: This is a required field. This could be the same as the Account or it could be a code identifier to that building.
Account Name: Accounts are your customers; they are billing entities. Payment terms will be setup at the account level.
Inspection Template: You can create a template name from this screen. One template will be assigned to a location, this is customizable. This will determine the Areas and Spots to be graded during an Inspection (For more details go to Inspections Section).
Site Services Coordinator: This is the person responsible for the specific service location, he/she will be able to see the location in the mobile application and receive notifications for inspections and work orders.
Assigned Deficiencies: If this flag is selected, the site services Coordinator will get deficiencies auto assigned. Deficiencies will be automatically send to CC Mobile and CC Inspect to she Site Services Coordinator.
Supervisor Name: This person will be able to see location in the mobile devices. For CC Inspect, create new inspections. For CC Mobile, create new work orders. He/she will also get service locations in the other applications.
Sales Tax: This is for your use to track sales tax codes or information and to pass this on to your accounting system.
Job Site: If this flag is selected, the information for the service location will be send down to CC Mobile. You will need to have this enabled in order to be able to create new work orders from the mobile app. If this flag is not enabled, then this location will only go down to CC Inspect, Supplies, Sales and Equipment apps.
Branch Name: Branches are used as a permissions filter (For more information please go to the Branch section.)
Reference Number: This field is used for Kiosk clock in and out.
Quality Base Line Percent: This is similar to a KPI, used for Inspections base line.
Auto Report: If this is enabled, a quality summary report will be automatically emailed to the Site Services Coordinator and Supervisor.
Edit Service Location information and Include Attachments.
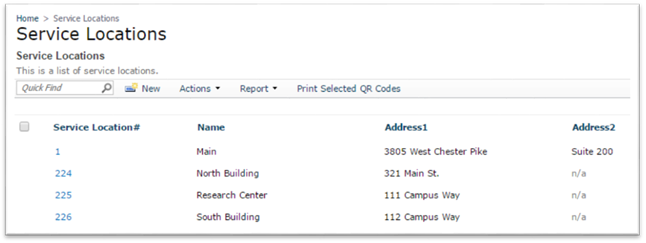
On the service location Grid, click on the link for Service Location# to access the service location detail
![]()
Click on Edit, this will allow you to change the information saved for that service location. This will also give you the option to add any notes and attachments. Only one attachment is allowed to be saved per service location
![]()

If you scroll down the Service Location Details, there will be eight tabs: Contacts, Jobs, Work Orders, Inspections, Supply Shipments, Equipment List, Floor List, Log Book.

Contacts: You are able to create and assign a contact at the service location level.
Jobs: You are able to see history and create reports for jobs related to a specific service location.
Work Orders: You are able to see history and create reports for any work orders related to a specific service location.
Inspections: You are able to see history and create reports for inspections related to a specific service location.
Supply Shipments: You are able to create a New supply shipment, for more information please see Supplies module.
Equipment List: You are able assign equipment to a service location, for more information please see Equipment module.
Floor List: This feature is used in the Inspection module, if you want the template to display floors you can add the floor listing for the Service location. If you have the Floor list, you will also be able to enable for CC Inspect the option under settings to “Use pre-defined floor list for the service location”
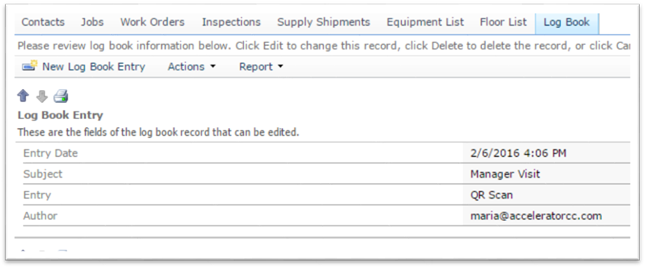
Log Book: The log book will display any communication sent from Customer Portal. These comments will display in the Dashboard in CC Mobile.
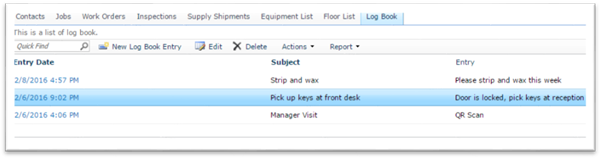
If QR Codes are setup, the Log Book, will also display the time and date the Site Services Coordinator and/or Supervisor visits the service location.
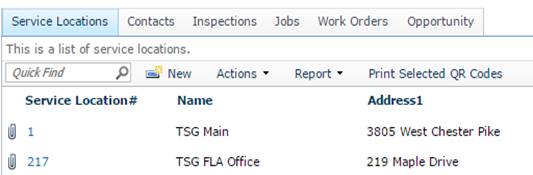
Service Location Grid and QR Codes
From the service location grid, you can create reports and filter desired information. The filter on the grid is available throughout the software.
On the Service Location Grid header, you have the option to print Service Location QR Codes. The first step is to select the desired service locations. Then click on Print Selected QR Codes, this will create a report with the selected QR Codes.
QR Codes can then be placed at the location and when the Site Services Coordinator or Manager arrives to the location, they will be able to scan with their CC Mobile. The scanning of the QR Code will then create a Log Book entry giving you more control of your business. For QR Code Scanning with the mobile app, please see instructions on CC Mobile.
![]()
